Saturday, 29 November 2014

November Card Club Pt 2

 So here's November Card Club Part 2... Paula's class. This month the class was all about using the stamp set Lovely As A Tree. It was even a crafty sunday afternoon class instead of a weekday evening as we thought the class was going to take us a lot longer than normal card club does.

The first project was a candle surround.
We used:
  • Lovely As A Tree stamp set
  • Holiday Home stanp set
  • White Vellum cardstock
  • Whisper White ink
  • Tuxedo Black Memento ink
The worst part of this project was the wait for the black ink to dry so we could stamp the white layer to look like snow. We may have been doing other projects while we waited but I just wanted to finish this one so I could turn the tealight on to see how cool it looked.
 ...And here the surround is with the electric tealight switched on, lovely glow and it really works with the background of the trees.

Then we moved on to making notebox with a couple of cute little cards inside of it.
We used:
  • Envelope Punch board
  • Lovely As A Tree stamp set
  • Crumb Cake ink
  • Early Espresso ink
  • Linen Thread
  • Sponge Daubers
  • Candy Dots Neutrals
  • Woodgrain embossing folder
  • Autumn Accents Bigz
  • Something To Say stamp set
  • Word Window punch
  • Modern Label punch
  • Crumb Cake cardstock
  • Early Espresso cardstock
  • Very Vanilla cardstock
I went for making 2 different card designs to go in my box, changing one card to be horizontal and by using a different sentiment to give a little variety in my cards.
Of course there had to be some proper card making too, after all it is card club.
 
 The first card used:
  • Lovely As A Tree stamp set
  • Crumb Cake ink
  • Crumb Cake cardstock
  • Very Vanilla cardstock
  • Linen Thread
  • Woodgrain embossing folder
  • Candy Dots Neutrals
  • Sponge Daubers
  • Project Life Corner punch
The second card used:
  • Crumb Cake carstock
  • Very Vanilla cardstock
  • Crumb Cake ink
  • Early Espresso ink
  • Candy Dots Neutrals
  • Lovely As A Tree stamp set
  • Greetings Of The Season stanp set
  • Ovals Collection framelit (to make the mask for background)
 We finished off by making a little giftbox...with the dreaded Envelope Punch Board again!
We used:
  •  Envelope Punch Board
  • Crumb Cake cardstock
  • Crumb Cake ink
  • Autumn Accents Bigz
  • Burlap Ribbon
  • Glimmer Paper Gold
  • Watercolour Wonder washi tape
 This month we even got 2 goodies as it's our last class before Christmas. The first was a tube of Dazzling Details Silver Sparkle in a very sparkly box made using the Curvy Keepsake Box framelit.
 The second was a Swizzels lolly in a cute little box style bag.
Now we just have to wait for the new catalogue to come out so we can pick the theme for January's class.

Photobucket

Friday, 14 November 2014

November Card Club Pt 1

 So the first card club of November wasn't really a normal card club night...we had more of a workshop making 3d items to inspire us for christmas.

The first thing we made was a giftbox. I must admit I hate using the Envelope Punchboard with a passion but for some unknown reason I found the Gift Box Punchboard a lot easier. Anyone else have this issue or is it just me?
 I used:
  • Gift Box Punch Board
  • Under The Tree Speciality DSP
  • Cherry Cobbler Sheer Linen Ribbon
 Then we moved on to my favourite project of the evening, I've been wanting to play with this die for ages as Pinterest has shown me so many good ideas to use it for. I coloured my pearls in using my cherry cobbler blendabilities so they looked like berries. Inside this little christmas pudding was a ferrero rocher...yea i ate that when I brought the pudding box home.
I used:
  • Curvy Keepsake Box Thinlit
  • Whisper White cardstock
  • Early Espresso cardstock
  • Under The Tree Speciaility DSP
  • Jewels Basic Pearl
  • Cherry Cobbler Blendabilities
The next project was a giftcard holder, or money holder as was suggested by Suriya who was running the workshop.
I used:
  •  Dots mask
  • Coastal Cabana ink
  • Gift Card Enclosure Pack
  • Metallic Bakers Twine
  • Mossy Meadow ink
  • Sponge Daubers
 Suriya must know that I get through masses of notebooks a year as there was a notebook project on the to do list as well... I kept mine rather simple as it will no doubt end up in my work bag and get a tad dirty.
I used:
  • Kraft Grid Journal
  • Stars mask 
  • Coastal Cabana ink
  • Sponge Daubers
Then there was a candle to work on...
I used:
  • Heat Tool
  • Tissue Paper
  • Real Red ink
  • Mossy Meadow ink
  • Festival of Trees stamp set
Using some of the spare card I had I made myself a dozen tags to go on presents.
I used:
  • Whisper White cardstock
  • Festival of Trees stamp set
  • Mossy Meadow ink
  • Tag Topper punch
There were also some card blanks to make 5 cards. really love this stamp set and it's so easy to use, it's one of the new photopolymer sets.
I used:
  • Whisper White cardstock
  • Mossy Meadow ink
  • Real Red ink
  • Pear Pizzazz ink
  • Wondrous Wreath stamp set
The final project was a fabric bag to decorate.
I stamped different images from the same stamp set on either side of the bag.
I used:
  • Mini Muslin Bag 
  • Mossy Meadow ink
  • Crushed Curry Chevron Ribbon
  • Many Marvellous Markers
November card club Pt 2 is on the 23rd and it's more 3d projects but this time playing with the stanmp set Lovely As A Tree. 
 
If anyone has pinterest or blog links to projects using this stamp set can you share them with me as a comment for future inspiration please?

Photobucket

Wednesday, 12 November 2014

Drawer Update

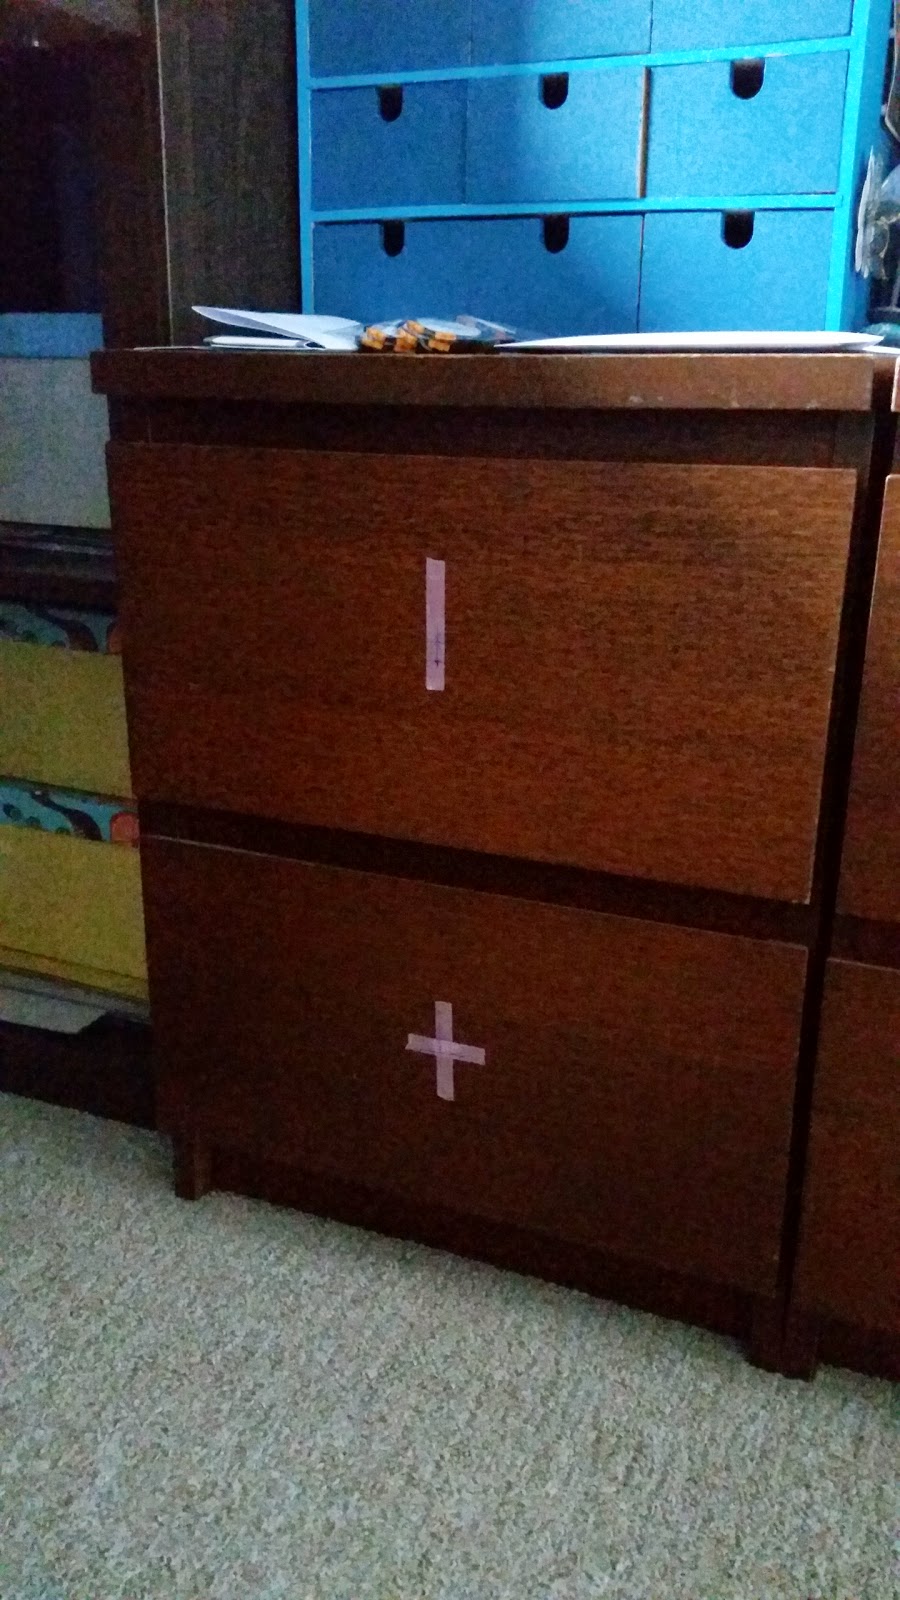
Earlier this year I bought 4 door knobs from Anthropologie during a shopping trip to London with a friend. I planned to put them on the drawers in my study when I had finished painting it...well months after the painting was finished there were still no blue door knobs on the drawers.

Finally on a day off I decided to have a clear out in the study and found the door knobs hidden away, so they had to be fitted there and then!
I did it properly, I measured everything out and used tape to draw my centre point on for drilling the hole on each drawer.
A bit of fiddly around trimming the length of the bolt on the door knob and a lot of sawdust later the door knobs were fitted to now become drawer knobs.
I chose 2 different knobs so they could be alternated over the drawers. I must admit the white patterned one is definitely my favourite.
Thanks Anthropologie for giving my boring craft stash drawers a new lease of life in my newly decorated study. Now what should I get around to customising/upcycling next?

Photobucket

Saturday, 8 November 2014

2014 Christmas Cards

This year I've been really organised and I've already made all the christmas cards for friends and family, I've ven started making some of the presents too!

I've done 3 different designs this year, 4 of each design to cover all the people we send cards to. Simple designs but I got to play with quite a few of my favourite Stampin' Up bits.
The snowflake card used:
  • Northern Flurry embossing folder
  • Sassy Salutations stamp set
  • Coastal Cabana ink
  • Turquoise card (non SU)
  • Silver stickles (non SU)
 The tree card used:
  • Gorgeous Grunge stamp set
  • Sassy Salutations stamp set
  • Real Red ink 
  • Real Red cardstock
  • Star punches (non SU)
The third design I decided to use my favourite batch of Stampin Up baubles and my new Flowering Flourishes stamp set from Octobers card club.

For some reason on the blue cards I mixed the bauble designs but on the red I didn't, guess I just wasn't paying that much attention as I had no design set out before I started sticking them on.


These cards used:
  • Delightful Decorations stamp set
  • Delightful Decorations punch
  • Sassy Salutations stamp set
  • Flowering Flourishes
  • Real Red ink
  • Pacific Point ink
  • Jewels Basic Rhinestone
  • Red and blue cardstock (non SU)
  • Gumball Green ink


Hopefully next year I can be just as organised and get everything done early as there's bound to be last minute cards to make and things to do, there always is.

Photobucket

Wednesday, 5 November 2014

Flower Birthday Cards

In my organised state using my rest days to get things made I've made both of my Nan's birthday cards early too! Cue playing with more Stampin Up sets that I can't wait to use.
 
The first card is for my Nan whose birthday is November 11th hence making the flower look like a poppy.
This card used:
  • Cherry Cobbler Blendabilities
  • Blended Bloom stamp
  • Sassy Salutations stamp set
  • Real Red ink
  • Jewels Basic Rhinestone
  • Memento ink
  • Ivory cardstock (non SU)
  • Black stitched ribbon (non SU)
The second card is for my other Nan whose birthday isn't till mid December but I was in the flow of making cards so I thought I'd best make it while I had a design in my head.
This card used:
  • Perfectly Penned stamp
  • Stippled Blossoms stamp set
  • Strawberry Slush ink
  • Pink Pirouette ink
  • Bermuda Bay ink
  • Coastal Cabana ink
  • Pistachio Pudding ink
  • Gumball Green ink
  • Coastal Cabana cardstock
  • Pink Pirouette taffeta ribbon
  • Ivory cardstock (non SU)
 Here's hoping they both like their cards.

Photobucket

Saturday, 1 November 2014

Making Penguins

So I will admit I have a bit of a penguin obsession, I know...

Last year I made some icing penguins for our christmas cake, they were very fiddly and it was such a shame to have to eat them... so this year I decided to make some out of fimo instead so they could be reused and not eaten.
The white fimo of the penguins is glittery making them a little bit more festive, can't wait to see them on our christmas cake...now I just need to design the rest of our cake.

The other bit of penguin madness started at the Knitting and Stitching Show at Alexandra Palace a few weeks ago.... Mum bought me a half metre of penguin print fabric that I just couldn't leave behind. I made myself a tote bag from the fabric and still have enough left to make another makeup bag or something of a similar size.
 Anyone else get the pont that I kinda really like penguins???

Photobucket

Wednesday, 29 October 2014

October Card Club

 This month's card club was all about the stamp set Flowering Flourishes, we each picked a colour to work with and this time I chose Daffodil Delight.

Here's the cards we made....
  •  Daffodil Delight cardstock
  • Whisper White cardstock
  • Daffodil Delight ink
  • Flowering Flourishes stamp set
  • Sassy Salutations stamp set
  • Jewels Basic Rhinestone
  •  Daffodil Delight cardstock
  • Whisper White cardstock
  • Daffodil Delight ink
  • Flowering Flourishes stamp set
  • Sassy Salutations stamp set
  • Jewels Basic Rhinestone
  • Daffodil Delight seam binding
 
  • Daffodil Delight cardstock
  • Whisper White cardstock
  • Daffodil Delight ink
  • Flowering Flourishes stamp set
  • Sassy Salutations stamp set
  • Jewels Basic Rhinestone
  • I Love Lace stamp 
  • Modern Label punch
  • Word Window punch
  • Daffodil Delight seam binding
  •  Daffodil Delight cardstock
  • Whisper White cardstock
  • Daffodil Delight ink
  • Flowering Flourishes stamp set
  • Itty Bitty Banners stamp set
  •  Honeycomb embossing folder
  • Bitty Banners framelits
  • Ovals Collection framelits
  • Daffodil Delight seam binding
 Next month is Lovely As A Tree, 3d projects and an afternoon of crafting....looking forward to it!
Photobucket

Saturday, 18 October 2014

Seaglass Lantern

 Over the last couple of years I've gathered quite a lot of seaglass and never really figured out what to do with it. I'm just fascinated by it, the awesome colours you can come across and how colours vary depending where in the world you are looking for it.
 After gathering even more seaglass on our recent trip to Spain I found my jar at home to be too full to add my most recent stash to it, so I had to start making something with my seaglass.
I decided to make a lantern to sit as a table centrepiece or on the sid rtable in our lounge. A cheap glass vase and a tealight holder from Ikea, electric tealight, baby oil and an hour of my time and this is what I came up with.
The baby oil is a total necessity otherwise the seaglass will be frosty, losing the lovely colours and shine you really want to see.
 Here's how the lantern looks when it's dark and the tealight is illuminated. Much better than I expected it to come out so I'm very impressed with it.
My seaglass jar is now almost empty so I need to satrt collecting again, roll on the next Spain holiday or UK beach trip somewhere known for seaglass!

Photobucket

Wednesday, 15 October 2014

Shaping Dough Bread Class

 At the end of September I went along to another Blackbird Bread baking class....this time I went as a helper not a student, though I did get to do some baking too.

The workshop this time was all about shaping dough, so maing pretzels and bagels, I had to pick which I wanted to make so I chose to go with pretzels as I wanted help learning how to twist them to the right stape.

We started with the pretzels, which were surprisingly easy to shape after a couple of attempts. They grew so much on their final prove as pretzel shapes!
 While we waited for the pretzels to finish their final prove we went about shaping our sundried tomato and basil ciabatta that we would be having as our supper during class.
The ciabatta smelt amazing when they came out the oven and tasted even better when we had them still warm with some cheese and a little wine.
Here's how the finished pretzels came out... shame a few lost their pretzel look but for a first attempt I'm happy and I know for next time to leave larger gaps in the shaping now I'm aware how much they grow in the final prove.
 Here's all my wonderful bready bakes of the evening...well minus the 3 ciabattas that had to be eaten between us as they were too tempting to resist...there was also a very ugly pretzel that I refused to photo after it came out the oven, was more a blob than a pretzel!

Photobucket